The Client Object Model only works in SharePoint 2010 and does not work for anonymous users. SPServices works the same in both SharePoint 2007 and 2010 and works just fine with anonymous users as long as anonymous users have access to the pages and the scripts. As far as just calling the Web Services directly? Well, that’s basically what SPServices does except it takes care of the heavy lifting for you and wraps the Web Service methods in easy to use functions. So, if you prefer to manually write SOAP envelopes and all that fun stuff, have at it.
Thursday, March 26, 2015
Sunday, December 7, 2014
USING MERGE-SPLOGFILE TO FIND CORRELATION
ID
When you are hit with a problem in SharePoint
2013 you get notified to use a correlation id to check for further details in
the trace logs (ULS logs).

So you hopefully start
up ULS Viewer and open up the relevant logs
and search like a mad man after this specified correlation id. Sometimes you
don’t find the provided correlation id in the log file you opened. Is there a
easier way?

Yes and that is to use
the SharePoint PowerShell command Merge-SPLogFile. According to the description
of Merge-SPLogFile on Microsoft TechNet:
“Combines trace log
entries from all farm computers into a single log file on the local computer.”
Let me explain how you can use this powerful
command.
Basic Usage
Lets visualise a simple farm.

As the example Farm image above we have two
frontend servers, application server and database server. If I wanted to
consolidated the last hour of SharePoint log entries from the front-end server
and application server I would open up SharePoint Management Shell on one of
the servers and type the following command:
Merge-SPLogFile –Path
“E:\SPLogs\MergedLogs.log” –Overwrite

Now that was a very
basic example to merge the various servers log files. More parameters are
available on theMicrosoft TechNet article for Merge-SPLogFile.
For example Area, Category, Level, Message, StartTime, EndTime and more.
Finding Correlation ID
What the following example show is how to find
the log entries for a specific correlation id:
Merge-SPLogFile –Path
“S:\SPLogs\MergedLogs.log” –Correlation 3ae2a6c0-da14-43a1-afda-5bb6bbff3d43
-Overwrite

Since the log files
are merged with just the specified correlation id you can load the log file in ULS
Viewer to easily view the entries. Please be aware that the log
can be empty if the logging level is set to low for the SharePoint category.
Just go to SharePoint Central Administration to increase the logging level.

As you can see in the image above the
correlation id has 19 matching entries in the log file. Much less log entries
to scroll through.
Summary
I hope this helps you on finding SharePoint
errors quicker and easier. Let me know what your favourite commands and tools
are for debugging SharePoint.
Thursday, July 31, 2014
Accessing the SSL Certificate with thumbprint rather than SignInCertificate Name
Use the below code to access the ssl certificate from its certificate store in Custom STS
public static X509Certificate2 GetCertificateByThumbprint(string thumbprint)
{
var store = new X509Store(StoreName.My, StoreLocation.LocalMachine);
X509Certificate2Collection certificates = null;
store.Open(OpenFlags.ReadOnly);
try
{
certificates = store.Certificates;
var certs = certificates.Find(X509FindType.FindByThumbprint, thumbprint, false).OfType<X509Certificate2>().ToList();
if (certs.Count == 0)
throw new ApplicationException(string.Format(Constants.ExceptionMessages.msgNocertificate, thumbprint));
else if (certs.Count > 1)
throw new ApplicationException(string.Format(Constants.ExceptionMessages.msgMultipleCertificates, thumbprint));
return new X509Certificate2(certs[0]);
}
finally
{
if (certificates != null)
{
for (var i = 0; i < certificates.Count; i++)
{
var cert = certificates[i];
cert.Reset();
}
}
store.Close();
}
}
Note:- never copy and paste the thumbprint directly. Type the value in
the web.config. While typing remove the white spaces.
Gigya Authentication process
Gigya is a third part service provider which can let you manage the authentication providers like google, facebook, yahoo, etc..
To have it in your sharepoint follow below approach to authenticate the user using gigya.

To have it in your sharepoint follow below approach to authenticate the user using gigya.
Configuration need to be done in
below steps
- Create apps in provider sites.(Refer Gigya site)
- Crete an app in Gigya site and use the app key, secret key of the provider site to configure Gigya App. (Refer Gigya site)
- Configure Social Network Application Keys in Gigya app. (Refer Gigya site)
- Create STS to authenticate to SharePoint site by getting the user information from Gigya app.
- Export the SSL certificate with/without private key
- Registering the SSL certificate using PowerShell commands.
Wednesday, July 9, 2014
At times you may get a requirement to create a page which can accessible by anonymous users also. for example to provision the user to change their password or to log-in to the site. In that case you may have to go for creating a page where user can perform this kind of actions. To create such page you cannot use the default LayoutsPageBase base class for your page because it would trigger SharePoint to prompt anonymous users to log on.
Instead, you need to use another base class for your anonymous application page calledUnsecuredLayoutsPageBase. You can find its MSDN reference at:
http://msdn.microsoft.com/en-us/library/microsoft.sharepoint.webcontrols.unsecuredlayoutspagebase.aspx
Your page class would look like this:
public partial class ApplicationPage1 : UnsecuredLayoutsPageBase
{
protected void Page_Load(object sender, EventArgs e)
{
}
}
Remote Interfaces permissions - item not deleting
 Sharepoint provides two ways a user can delete an item from any list:
- From “Delete Item” menu option available in ribbon
- From “Delete Item” menu option available in the item’s context menu
Now you may think that both these options are just alias of one another, i.e. do the same thing the same way which is to delete the item, and must be implemented the same way.
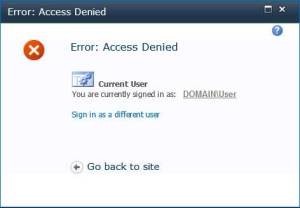
But that is not the case. Both are implemented differently, i.e. both these options use different route of accessing the delete functionality on server. The context menu option uses remoting where as the ribbon option doesnot. So due to this, though you may have given “Delete Items” permission on the list, you need to provide one more permission, “Use Remote Interfaces”, to allow successful deletion from delete item option available from an item’s context menu. Not providing this second permission would lead to a condition where in the user would be able to delete items from “Delete Items” link available in Ribbon, but trying to delete an item from that item’s context menu would lead to an “Access Denied” error message.
Thus, when ever you find yourself into the situation where in the delete from ribbon is working but the same from context menu is giving error, go to the permission level that apply to the list or that item, provide “Use Remote Interfaces” permissions, MISSION ACCOMPLISHED.
Tuesday, June 10, 2014
Enable Sharepoint js intellisense
I know most of you people find it difficult to add intellisense to visual studio 2012.
Follow the below steps to get it working .
It works like a charm in JavaScript file for SharePoint hosted app:


3. Click on Text Editor -> JavaScript ->IntelliSense -> References

4. Add the sp.debug and clicked on "OK".
Follow the below steps to get it working .
It works like a charm in JavaScript file for SharePoint hosted app:
It works for all my apps. I don't have to reference SharePoint JavaScript API for each new app.
How it works
How it works
1. copy the path "C:\Program Files\Common Files\Microsoft Shared\Web Server Extensions\15\TEMPLATE\LAYOUTS\SP.debug.js"
2. Open Visual Studio and clicked on TOOLS->Options
4. Add the sp.debug and clicked on "OK".
Subscribe to:
Posts (Atom)